背景
- 为了确保app或者library库的质量,有一个完整的测试非常重要。很长一段时间,Android开发工具都缺乏针对完整性测试的支持,但是最近,google为之做了大量的工作,其让开发者做测试变得更加容易了,一些旧的框架更新了版本,新的框架也被加入进来。我们现在不仅可以在Android studio中运行这些测试,甚至可以用gradle通过命令行直接执行。
- 接下来,主要说明三部分内容:
- 单元测试
- 功能测试
- 测试覆盖率
单元测试
- AndroidStudio和gradle android插件默认都支持单元测试,使用之前,需要做一些配置。
- 好的单元测试不仅仅能够确保app的质量,同时还能让新代码的开发更加容易。
JUnit
- JUnit是非常常用的一个框架,但是它只能测试代码的逻辑,对于Android SDK 相关的代码却没办法执行,运行会报错。
开始编写junit测试之前,需要新建一个目录(一般叫test),它会和main目录在同一层级,如下所示:
123456789app└─── src├─── main├─── java│ └─── com.example.app└─── res└─── test└─── java└─── com.example.app这样,你就可以在test目录下创建JUnit测试代码了。同时,你需要在build.gradle中添加JUnit依赖:
123dependencies {testCompile 'junit:junit:4.12'}这里testCompile,表示junit包只会在测试的时候导入,其他情况不会导入jar包。如果你有其他的构建版本,你可以这么做:
123dependencies {testPaidCompile 'junit:junit:4.12'}上面都配置好之后,我们就可以开始写测试代码了,下面是个简单的例子:
12345678910import org.junit.Test;import static org.junit.Assert.assertEquals;public class LogicTest {public void addingNegativeNumberShouldSubtract() {Logic logic = new Logic();assertEquals("6 + -2 must be 4", 4, logic.add(6, -2));assertEquals("2 + -5 must be -3", -3, logic.add(2, -5));}}通过下面的命令运行上面的测试代码:
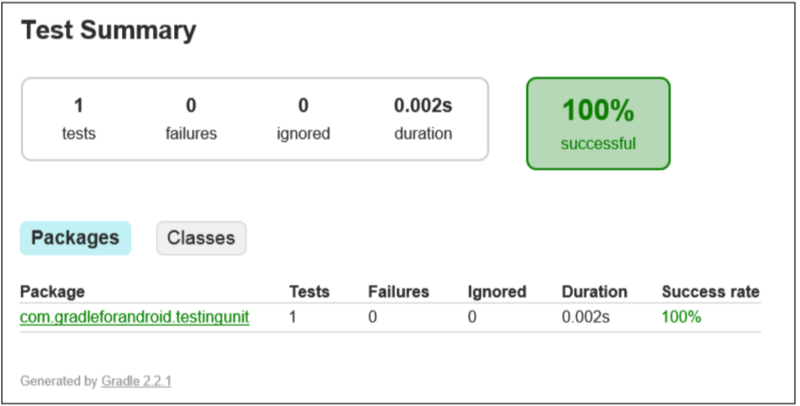
1234567$ gradlew test如果想在特定版本执行,可以这么做:$ gradlew testDebug如果单个用例失败导致整个测试失败,我们可以通过下面的命令,将整个用例都跑一遍:$ gradlew test --continue执行完之后,可以在app/build/reports/tests/debug/目录下面找到一个html测试报告。这份测试报告描述了测试的大致情况:几个用例执行成功,耗时多少等等,如下图所示:
Robolectric
- JUnit只能测试和Android 无关的代码,那么如果想测试Android相关的代码,那么Robolectric就是利器,它可以使用Android SDK和资源文件,它还是跑在JVM上,测试相对来说比其他UI自动化要迅速。
在使用Robolectric之前,需要添加依赖,注意同时还需要添加JUnit包:
12345678apply plugin: 'org.robolectric'dependencies {compile fileTree(dir: 'libs', include: ['*.jar'])compile 'com.android.support:appcompat-v7:22.2.0'testCompile 'junit:junit:4.12'testCompile'org.robolectric:robolectric:3.0'testCompile'org.robolectric:shadows-support:3.0'}Robolectric测试类也需要写在test文件夹下,如下所示:
1234567891011121314151617// 看上去写法有点复杂(RobolectricTestRunner.class)(manifest = "app/src/main/AndroidManifest.xml", sdk = 18)public class MainActivityTest {public void clickingButtonShouldChangeText() {AppCompatActivity activity = Robolectric.buildActivity(MainActivity.class).create().get();Button button = (Button)activity.findViewById(R.id.button);TextView textView = (TextView)activity.findViewById(R.id.label);button.performClick();assertThat(textView.getText().toString(), equalTo(activity.getString(R.string.hello_robolectric)));}}
功能测试
- 用于测试一个app的多个模块能否正常工作,比如:点击某个按钮之后,是否能正确打开某个页面。
- 这里介绍的是Google自己的框架:Espresso。AndroidStudio最新版本已经支持Espresso脚本录制。
Espresso
- Google创建Espresso的目的在于简化开发人员编写测试用例。
- 需要定义一个runner来运行测试用例,放到AndroidTest目录下(和上面提到的test目录、main目录同一层级),Google提供了AndroidJUnitRunner测试runner,它能在手机上运行JUnit测试,测试runner可以安装apk、执行测试、生成报告。
在build.gradle中需要如下配置:
123456789101112131415defaultConfig {testInstrumentationRunner"android.support.test.runner.AndroidJUnitRunner"}dependencies {compile fileTree(dir: 'libs', include: ['*.jar'])compile 'com.android.support:appcompat-v7:22.2.0'androidTestCompile 'com.android.support.test:runner:0.3'androidTestCompile 'com.android.support.test:rules:0.3'androidTestCompile'com.android.support.test.espresso:espresso-core:2.2'androidTestCompile'com.android.support.test.espresso:espresso-contrib:2.2'}直接运行可能会报错:
1234567891011Error: duplicate files during packaging of APK app-androidTest.apkPath in archive: LICENSE.txtOrigin 1: ...\hamcrest-library-1.1.jarOrigin 2: ...\junit-dep-4.10.jar//解决方案是android {packagingOptions {exclude 'LICENSE.txt'}}下面是个简单的测试用例:
123456789101112(AndroidJUnit4.class)public class TestingEspressoMainActivityTest {public ActivityTestRule<MainActivity> mActivityRule = newActivityTestRule<>(MainActivity.class);public void testHelloWorldIsShown() {onView(withText("Hello world!")).check(matches(isDisplayed()));}}
测试覆盖率
- 当代码中有单元测试之后,我们就需要对测试代码对源码覆盖率有个了解,这样方便我们调整和优化我们的单元测试代码。
- 这里介绍Jacoco,在另一篇文章中其实已经涉及到了Jacoco